
Adjusting the Density
You can change the print density in five levels. If small characters are smudged or image data is too dark, set the density in the "Light (minus)" direction. If thin lines are patchy, set the density in the "Dark (Plus)" direction.
Note
-
This function is not available with PS and XPS printer drivers.
-
On Windows, selecting the [Printer darkness] item gives priority to printer driver settings.
Using the Operator Panel
-
Press
 or
or  on the operator panel to display [MENUS], and then press
  (OK).
(OK). -
Press
or to display [PRINT ADJUST], and then press (OK). -
Press
or to display [DARKNESS], and then press (OK). -
Press
or to display the target value. -
Press
(OK) to add [*] to the right side of the set value. -
Press
 (ONLINE) to switch to [READY TO PRINT].
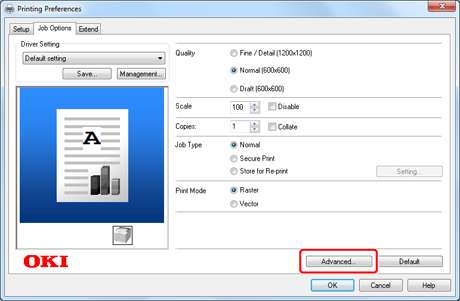
For Windows PCL Printer Driver
-
Open the file to be printed.
-
Select [Print] from the [File] menu.
-
Click [Preferences].
-
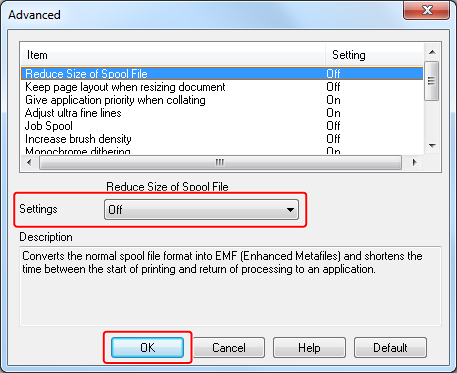
Click [Advanced] on the [Job Options] tab.
-
Select [Printer darkness] from [Item].
-
Select the appropriate density from the [Settings] drop-down list, and then click [OK].
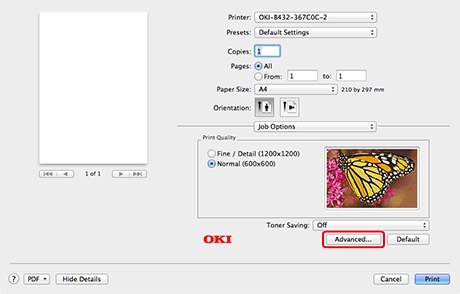
For Mac OS X PCL Printer Driver
-
Open a file.
-
Select [Print] from the [File] menu.
-
Select [Job Options] from the panel menu, and then click [Advanced].
-
Set [Density], and then click [OK].
