Unpacking and Installing the Printer
This section describes how to unpack and install the printer.
Note
-
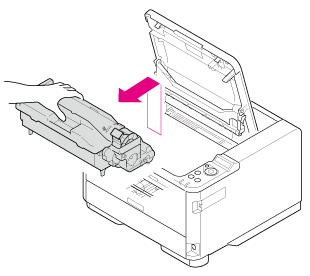
Use extra care when handling the image drum (the green cylinder), because it is fragile.
-
Do not expose the image drum to direct sunlight or strong light (approximately 1,500 lux or more). Even under room lighting, when leaving the image drum for 5 minutes or more, put sheets of paper over it to shield it from the light. Even with sheets of paper put over the image drum, do not leave it for 1 hour or more.
-
If the toner cartridge is not secured correctly, printing quality may decline.
-
If [TONER LOW] remains displayed on the operator panel even after installing a toner cartridge, set the cartridge again.
-
First, use the starter toner cartridge that comes with the printer, and after the status becomes [TONER LOW], use a toner cartridge purchased separately.
If you use a separately-purchased toner cartridge first, you cannot use the starter toner cartridge anymore.
For details on how to feed paper to the printer, refer to "Loading Paper".
-
Remove the printer from the box, and then remove cushioning material and the plastic bag from the printer.
A set of accessories is packed within the cushioning material.
-
Lift the printer, and then place it where it is to be installed.
-
Remove the protective tapes on the printer: two on the front side, and one on the rear side.

-
Remove the sheet of paper on the front side of the printer.
-
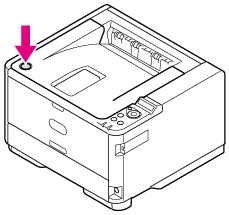
Press the [OPEN] button.
-
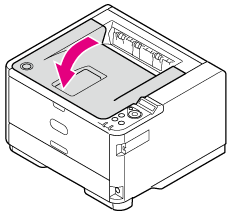
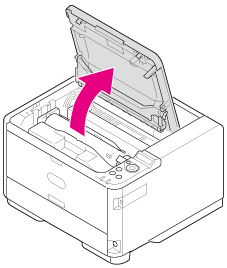
Open the top cover.
-
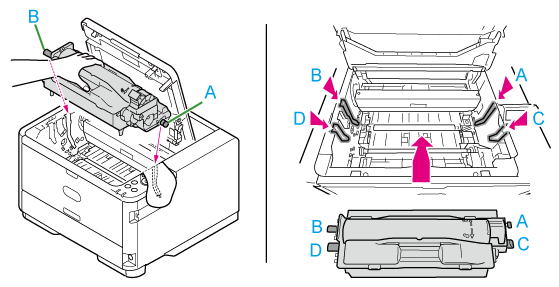
Gently take out the image drum in the upward direction.
Note
With the starter cartridge, the ISO/IEC19752 standard print pattern can be printed on approximately 2,000 sheets of A4 paper.
-
Remove the desiccant pack before installation.

-
Align the image drum pins (A to D) with the grooves (A to D) inside the main unit, and then reinstall the image drum into the printer.
-
Turn the knob on the right side in the direction of
 on the toner cartridge until the knob stops rotating while holding the top surface of the toner cartridge with your hand so that the cartridge does not rise.
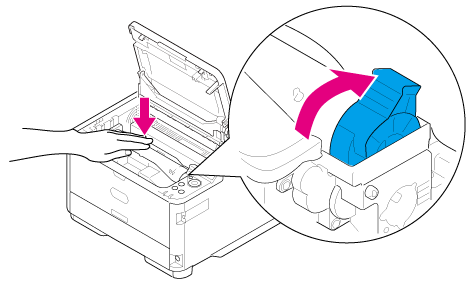
-
Close the top cover.