
For the USB Connection
You can select one of the following installation methods.
-
Recommended Install: Installs recommended printer drivers automatically
-
Custom Install: Installs printer drivers you select to install
You can install printer drivers collectively.
Note
-
Do not remove and reconnect the USB cable during printing operation.
-
Do not remove and reconnect the USB cable with a short interval of time.
Wait at least 5 seconds to reconnect the USB cable after it has been removed.
-
Simultaneous connection to all the other USB devices is not guaranteed.
-
When multiple printers of the same model are connected, they are displayed in the printer folder as "****", "**** (copy 1)", and "**** (copy 2)" (**** indicates the model name). The numbers assigned vary depending on the order that printers are connected or turned on.
-
When using a USB hub, connect the printer to a USB hub directly connected to the computer.
-
The actual printer driver may be different from the descriptions in this manual due to upgrades.
-
You must log in as the administrator.
Memo
Use a USB 2.0 interface cable not longer than 5 m (2 m or shorter recommended).
Installing Software with Recommended Install
-
Check that the printer and the PC are connected, and that the power is on.
-
Insert the "Software DVD-ROM" into a computer.
-
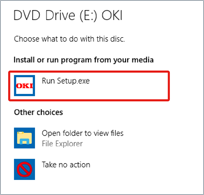
When [AutoPlay] is displayed, click [Run Setup.exe].

Memo
If the [User Account Control] dialog box is displayed, click [Yes].
-
Select a language from the drop-down list.
-
Read the license agreement, and then click [Agree].
-
Read the "Environmental advice for Users" thoroughly, and click [Next].
-
Select [USB connection], and click [Next].
-
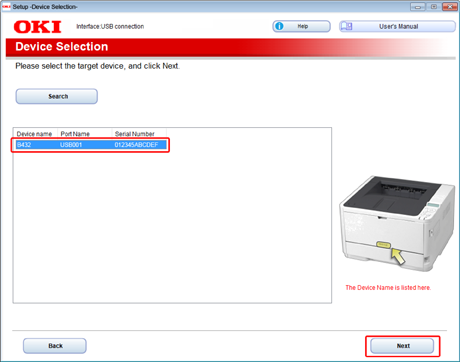
Select the printer to be used, and click [Next].
-
Click [Install Optional Software].
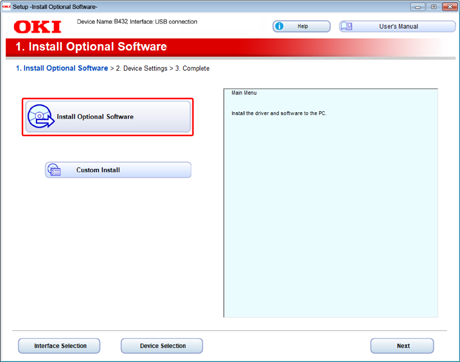
Installation starts.
Memo
The following software will be installed.
PCL6 printer driver
Other software is installed with a custom installation.
-
Check that the software installation is complete, and click [Printing Test].
Select the printer for the test print, and click [Printing Test].
Check that the test print has been performed, and click [OK].
-
Click [Complete].
-
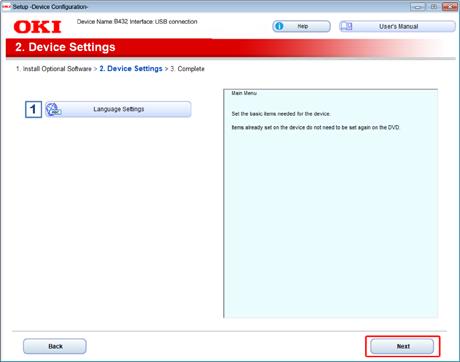
Click [Next].
-
Click [Exit].
-
Remove the "Software DVD-ROM" from the computer.
Installing Software You Want to Use with Custom Install
-
Check that the printer and the PC are connected, and that the power is on.
-
Insert the "Software DVD-ROM" into a computer.
-
When [AutoPlay] is displayed, click [Run Setup.exe].
Memo
If the [User Account Control] dialog box is displayed, click [Yes].
-
Select a language from the drop-down list.
-
Read the license agreement, and then click [Agree].
-
Read the "Environmental advice for Users" thoroughly, and click [Next].
-
Select [USB connection], and click [Next].
-
Select the printer to be used, and click [Next].
-
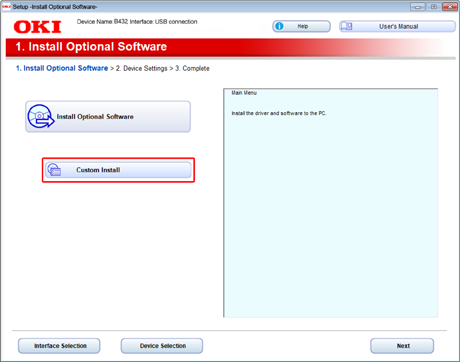
Click [Custom Install].
-
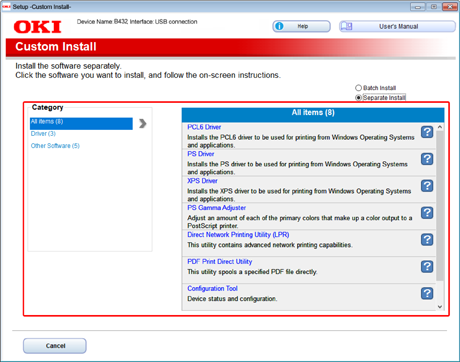
Click [Separate Install].
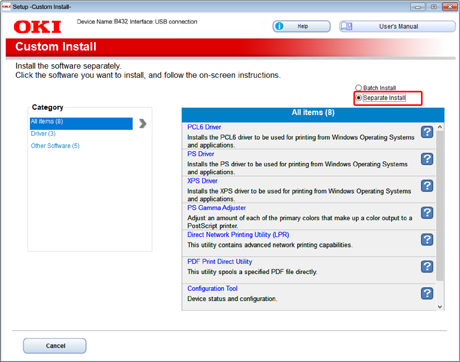
-
Click the printer driver you want to install.
Installation starts.
-
When the installation process is complete, click [Finish].
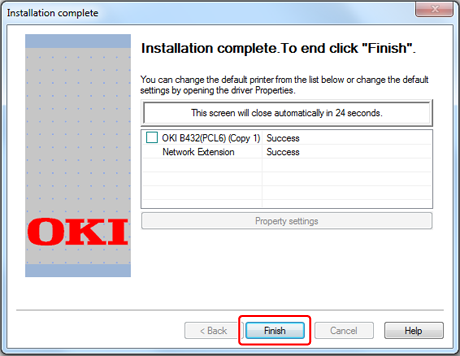
The installation is complete.
-
Click [x] in the upper right of the [Setup] window to close it.
-
Remove the "Software DVD-ROM" from the computer.
-
Perform a test print from the computer.
Memo
To perform a test print, click [Start] from the Windows menu, right-click the [OKI B432] icon in the [Devices and Printers] window, select [Printer properties] > [OKI B432 (*)] > [General] tab, and click [Print Test Page].
* Select a printer driver type by which you want to perform a test print.