
For the USB Connection
Printer driver operating environment
Note
The descriptions in this manual may vary depending on the upgraded version of the printer driver.
-
Product Requirements
Your printer supports the following operating systems:
-
Mac OS X 10.6.8 to 10.9
-
Installing the Printer Driver
-
Check that the printer and a computer are connected and the printer is turned on.
-
Insert the "Software DVD-ROM" into a computer.
-
Double-click the [OKI] icon on the desktop.
-
Double-click [Drivers] > [PS] > [Installer for OSX].
-
Enter the computer's administrator name and password, and then click [OK].
Follow the on-screen instructions to complete the installation.
-
Select [System Preferences] from the Apple menu.
-
Click [Print & Scan].
-
Click [+].
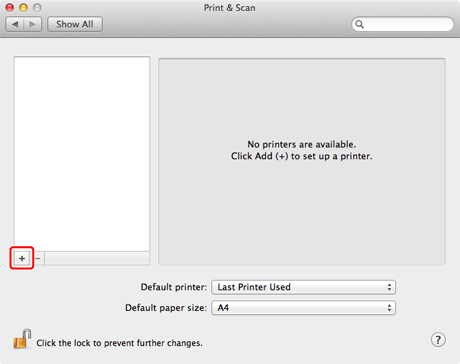
Note
If the printer is already displayed in [Printer], select the printer, and then click [-] to delete. Then, click [+].
-
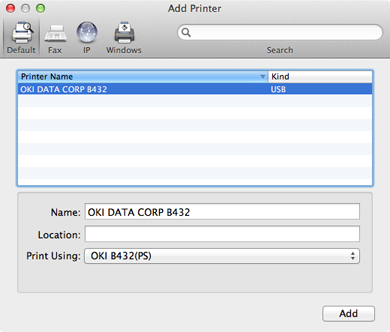
Select a printer with [USB] as [Kind], and then check that [OKI B432(PS)] is displayed for [Print Using].
-
Click [Add].
-
Check that the printer is added to [Printers] and [OKI B432(PS)] is displayed for [Kind].

Note
If [OKI B432(PS)] is not displayed for [Kind] correctly, click [-], delete the printer from [Printers], and then repeat steps 8 to 10.
-
Close [Print & Scan].
-
Click [Open Print Queue] to perform a test print.
-
Select [Print Test Page] from the [Printer] menu.
-
Remove the "Software DVD-ROM" from the computer.
Complete the installation.