
Setting the DHCP Server
DHCP is a protocol to dynamically assign an IP address to each host on a TCP/IP network. Also, a subnet mask can be set.
Note
To print via a network, the printer must have an IP address. For details on how to assign a static IP address, refer to the manual of your DHCP server.
Memo
The following procedure uses Windows Server 2008 R2 as an example. The descriptions in this manual may vary depending on your OS.
-
Click [Start], and then select [Administrative Tools] > [Server Manager].
If [DHCP] is already displayed in [Administrative Tools], proceed to step 8.
-
Select [Add roles] from [Roles Summary].
-
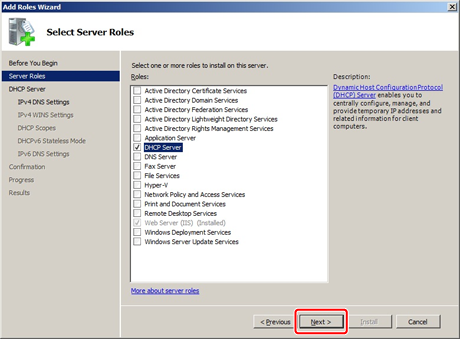
Click [Next] in [Add Roles Wizard].

-
Select the [DHCP Servers] check box, and then click [Next].
-
Set the settings by following the on-screen instructions if necessary.
-
Check the settings on the [Confirm Installation Options] screen, and then click [Install].
-
When the installation is complete, click [Close].
-
Click [Start], and then select [Administrative Tools] > [DHCP]to start the [DHCP] wizard.
-
Select a server to use from the DHCP list.
-
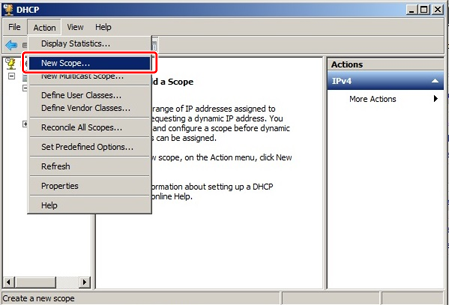
Select [New Scope] from the [Action] menu.
-
Set the settings by following the on-screen instructions in [New Scope Wizard] if necessary.
Memo
-
Be sure to set the default gateway.
-
Select [Yes, I want to activate this scope now] on the [Activate Scope] screen.
-
-
Click [Finish].
-
Select the new scope from the DHCP list, and then select [Reservation].
-
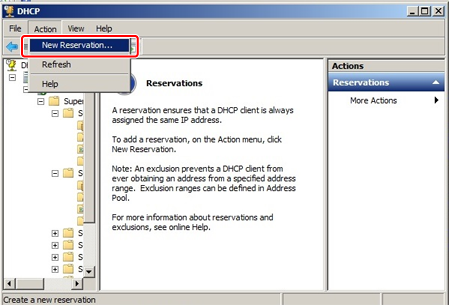
Select [New Reservation] from the [Action] menu.
-
Set the settings.
-
Click [Add].
When reservation is complete, the reserved address is displayed.

-
Click [Close].
-
Select [Exit] from the [File] menu.