
Printing on Custom Size Paper (Custom Page)
You can set your own paper size and use it like the predefined paper sizes. Open the printer driver on your computer and register the paper information (size, etc.) of the custom-size paper loaded. Select the registered paper size when printing.
Available paper size
|
Tray 1 |
Width 100 to 216 mm, Length 148 to 356 mm |
|
Tray 2 (Optional) |
Width 148 to 216 mm, Length 210 to 356 mm |
|
MP tray |
Width 86 to 216 mm, Length 140 to 1321 mm |
Note
-
Be sure to set the paper size so that the length is longer than the width.
-
When printing on paper with a paper length that exceeds 356 mm, use the faceup stacker for output.
-
This function may not be available in some applications.
-
If printing on large-size paper is not properly performed with the PS Printer Driver, setting [Quality] to [Normal] may resolve the problem.
-
The PS printer driver is not available with B412.
Loading Paper
-
Load paper.
-
Set the paper output.
-
Press
 (ONLINE) to select [READY TO PRINT].
Next, set printing settings from a printer driver.
For Windows PCL Printer Driver
-
Click [Start], and then select [Devices and Printers].
-
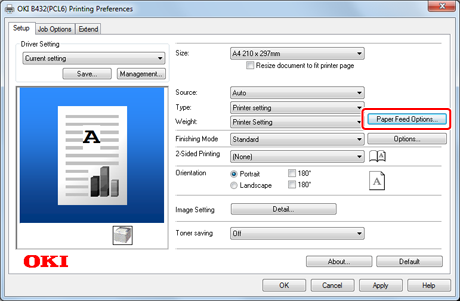
Right-click the [OKI B432] icon, and then select [Printing Preferences] > [OKI B432(PCL)].
-
Click [Paper Feed Options] on the [Setup] tab.
-
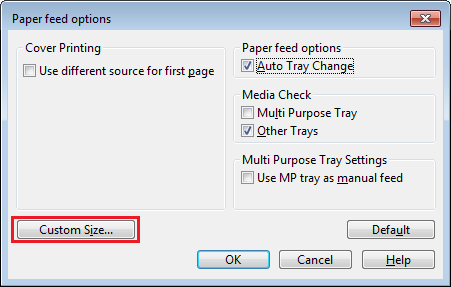
Click [Custom Size] on the [Paper feed options] screen.
-
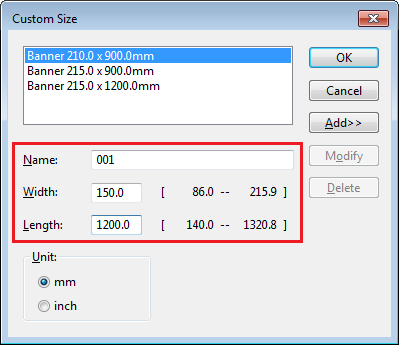
Enter information in [Name], [Width], and [Length] on the [Custom Size] screen.
-
Click [Add].
The created paper size is added to the bottom of the list from which you can select a paper size for [Size] on the [Setup] tab. You can save up to 32 paper sizes.
-
Click [OK].
The [Custom Size] screen closes.
-
Click [OK].
The [Paper feed options] screen closes.
-
Click [OK].
The [Printing Preferences] screen closes.
-
Open a file to print from an application.
-
Select the registered paper size, and then start printing.
For Windows PS Printer Driver
-
Click [Start], and then select [Devices and Printers].
-
Right-click the [OKI B432] icon, and then select [Printing Preferences] > [OKI B432(PS)].
-
Click [Advanced] on the [Layout] tab.

-
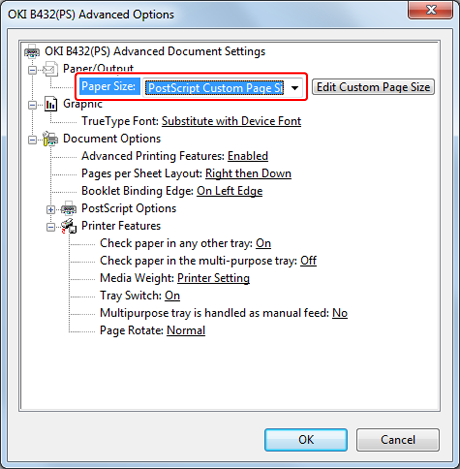
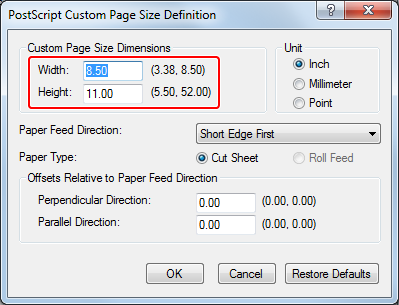
Click [Paper Size], and then select [PostScript Custom Page Size Definition] from the drop-down list.
-
Enter values in [Width] and [Height].
-
Click [OK].
The [PostScript Custom Page Size Definition] screen closes.
-
Click [OK].
The [OKI B432(PS) Advanced Options] screen closes.
-
Click [OK].
The [OKI B432(PS) Printing Preferences] screen closes.
-
Open a file to print from an application.
-
Select the paper size for the registered paper, and then start printing.
For Mac OS X Printer Driver
Note
With Mac OS X, you can enter custom sizes that exceed the printable range. However, in such a case, prints are not properly made. Enter values that are within the printable range.
-
Open a file to print on a computer.
-
Select [Page Setup] from the [File] menu.
-
Select [Manage Custom Sizes] from [Paper Size].
-
Click [+] to add an item to the list of custom paper sizes.
-
Double-click [Untitled], and then enter a name of the custom paper size.
-
Enter values in [Width] and [Height].
-
Click [OK].
The created paper is displayed at the bottom of the [Paper Size] list on the [Page Setup] panel.
-
Click [OK].
-
Select [Print] from the [File] menu.
-
Set other settings if necessary, and then start printing from the panel menu.