
Changing Print Quality (Resolution)
You can change the print quality to suit your needs.
Note
-
If you set to [Fine / Detail (1200x1200)] or [Fine / Detail (1200x1200)], you may not be able to print complex files. In such a case, use [Normal].
-
Printing process is also processed in the computer. Using a computer with faster processing speed can reduce printing time.
-
The PS printer driver is not available with B412.
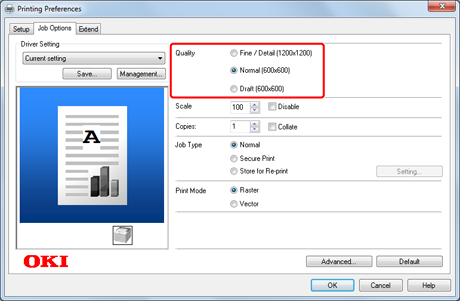
For Windows PCL Printer Driver
-
Select [Print] from the [File] menu.
-
Click [Preferences].
-
Change [Quality] on the [Job Options] tab.
-
Change other settings if necessary, and then click [OK].
The [Printing Preferences] screen closes.
-
Click [Print] on the [Print] screen.
Printing starts.
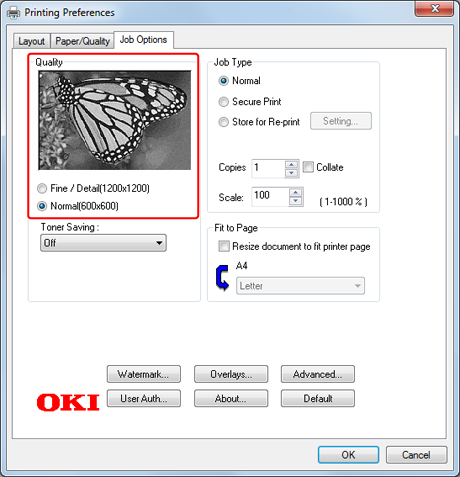
For Windows PS Printer Driver
-
Select [Print] from the [File] menu.
-
Click [Preferences].
-
Change [Quality] on the [Job Options] tab.
-
Change other settings if necessary, and then click [OK].
The [Printing Preferences] screen closes.
-
Click [Print] on the [Print] screen.
Printing starts.
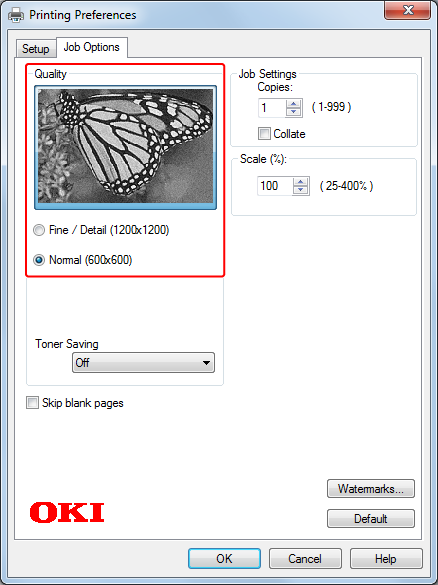
For Windows XPS Printer Driver
-
Select [Print] from the [File] menu.
-
Click [Preferences].
-
Change [Quality] on the [Job Options] tab.
-
Change other settings if necessary, and then click [OK].
The [Printing Preferences] screen closes.
-
Click [Print] on the [Print] screen.
Printing starts.
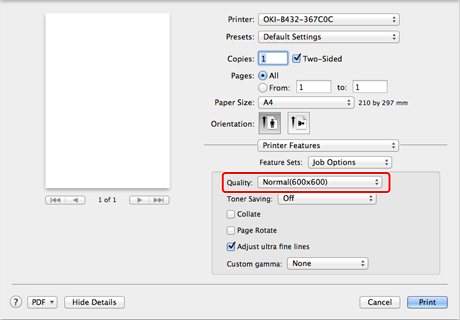
For Mac OS X PS Printer Driver
-
Select [Print] from the [File] menu.
-
Select [Job Options] in [Feature Sets] on the [Printer Features] panel.
-
Change [Quality].
-
Change other settings if necessary, and then click [Print].
Printing starts.
For Mac OS X PCL Printer Driver
-
Select [Print] from the [File] menu.
-
Select a print quality level from [Print Quality].
-
Select [Job Options] from the panel menu.
-
Select a value to set from [Print Quality].
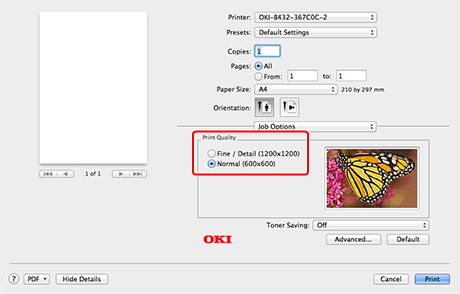
-
Change other settings if necessary, and then click [Print].
Printing starts.