
Printing with the Printer's Fonts
TrueType fonts can be replaced with the printer's fonts for printing.
Note
-
The font substitution function retains the document's format, but is not intended to reproduce font design. If the font design needs to be accurately printed, disable the font substitution function.
-
This function is not available with the Windows XPS printer driver and Mac OS X printer driver.
-
This function may not be available for some applications.
-
The PS printer driver is not available with B412.
For Windows PCL Printer Driver
-
Select [Print] from the [File] menu.
-
Click [Preferences].
-
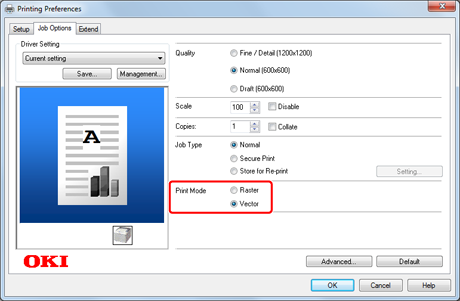
Select the [Job Options] tab.
-
Select [Vector] for [Print Mode].
-
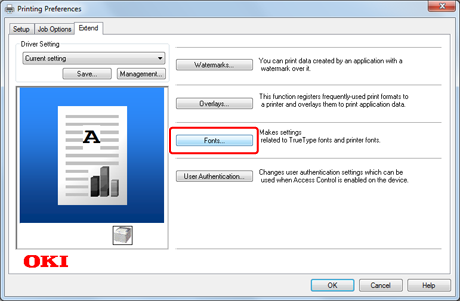
Select the [Extend] tab.
-
Click [Fonts].
-
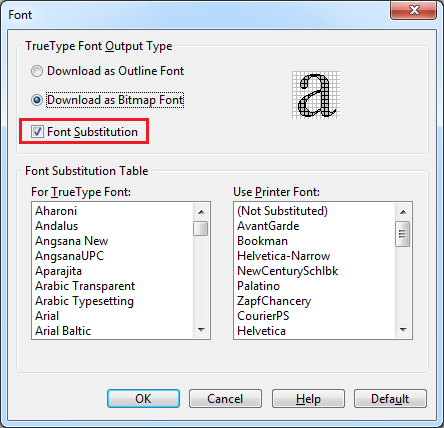
Select the [Font Substition] check box in [TrueType Font Output Type].
-
Specify the printer font to use instead of TrueType fonts in [Font Substitution Table].
-
Click [OK].
-
Change other settings if necessary, and then click [OK].
The [Preferences] screen closes.
-
Click [Print] on the [Print] screen.
Printing starts.
For Windows PS Printer Driver
-
Click [Start], and then select [Devices and Printers].
-
Right-click the [OKI B432] icon, and then select [Printer properties] > [OKI B432(PS)].
-
Replace a TrueType font with a printer font by using [Font Substitution Table] on the [Device Settings] tab.
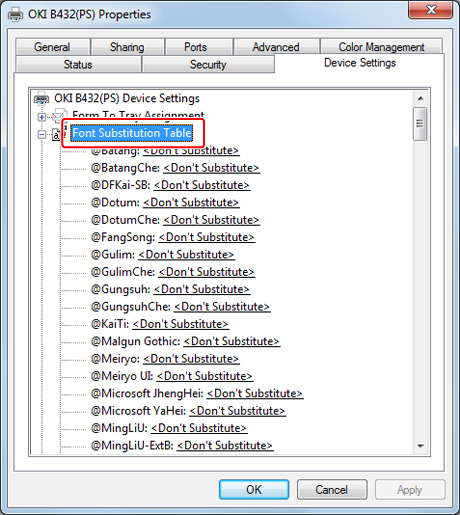
To specify the font, click a TrueType font, and then select a printer font to be used to substitute the TrueType font from the list.
-
Click [OK].
-
Open a file to print on a computer.
As an example, this section describes how to print by using Notepad.
-
Select [Print] from the [File] menu.
-
Click [Preferences].
-
Click [Advanced] on the [Layout] tab.
-
Select [Substitute with Device Font] for [TrueType Font].
-
Click [OK].
-
Change other settings if necessary, and then click [OK].
The [Preferences] screen closes.
-
Click [Print] on the [Print] screen.
Printing starts.