
Loading in Tray 1 or Tray 2
The following procedure describes how to load paper in Tray 1 or Tray 2.
Note
The following procedure uses Tray 1 as an example, and the same procedure applies to Tray 2.
-
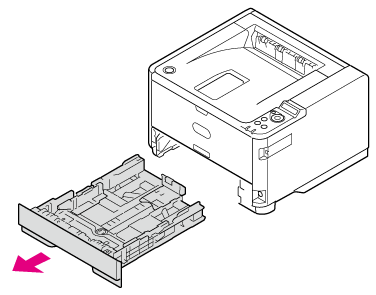
Pull the paper cassette out.
-
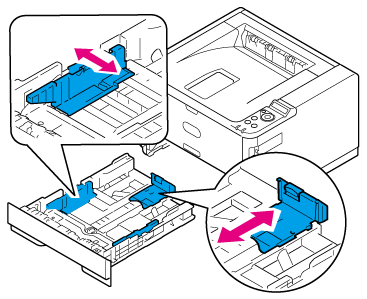
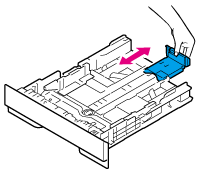
Adjust the paper guide and paper stopper to the paper size and secure them.
Note
Do not remove the cork attached to the metal plate.
-
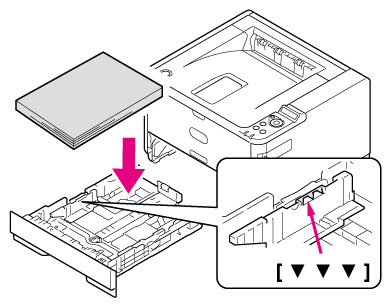
Fan a stack of paper well, and then align the edges of the paper.

-
Load paper with the print side face down.
Note
-
Place the paper against the front side of the paper cassette.
-
Do not press the paper against the paper stopper (rear) so hard that the paper bends.
-
Do not load paper over the "
 " mark of the paper guide.
-
B412, B432, ES4132 (less than about 25 mm total thickness with 250 sheets of paper with a paper weight of 80 g/m2).
-
B512, ES5112 (less than about 25 mm total thickness with 530 sheets of paper with a paper weight of 80 g/m2).
-
Note
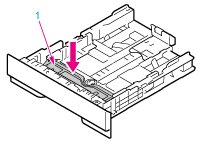
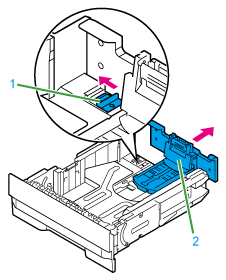
If the metal plate (1) under the paper in the paper cassette is up, press it down until it locks with a click before inserting the paper cassette into the printer. Inserting the paper cassette without pressing down the metal plate may cause malfunction.
Memo
-
To use A4, Legal (13 inches), Legal (13.5 inches), or Legal (14 inches) size paper with Tray 1, pull out the paper stopper toward the rear of the paper cassette. To shorten the length of the paper stopper, press the paper stopper toward the front side of the paper cassette.
-
To use A4, Legal (13 inches), or Legal (14 inches) size paper with Tray 2, move the lock lever (1) in the direction of the arrow to unlock, and then pull out the rear part of the paper cassette toward the back side. Unlock the lock also when shortening the paper cassette, which is done by pushing in the rear part of the paper cassette toward the front side.
-
In the case of a 530-sheet cassette, unlock the paper stopper before pulling it out.
-
-
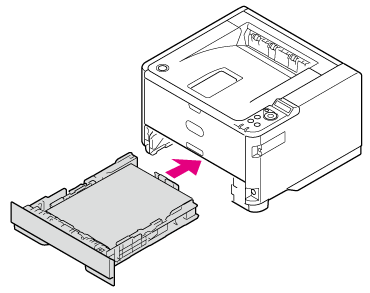
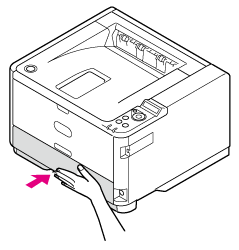
Insert the paper cassette into the printer.
Register the loaded paper in the printer. Proceed to "Registering the Paper Size, Type, or Weight".