
Setting to Send an E-mail from the Printer
You can set failure notification settings by using the Web page.
Memo
-
If you specify a domain name in [SMTP Server], set the DNS server in the [TCP/IP] setting.
-
You must set the mail server to allow the printer to send an E-mail. For details on the mail server setting, contact your network administrator.
-
If you use Internet Explorer, set the following before you send a test mail.
In the Web browser, select [Tools] > [Internet options], and then click [Custom level] on the [Security] tab. Then, select [Enable] in [Allow websites to prompt for information using scripted windows].
-
Open the Web page of the printer.
-
About the IP Address of the printer
-
How to log in to the Web page
-
-
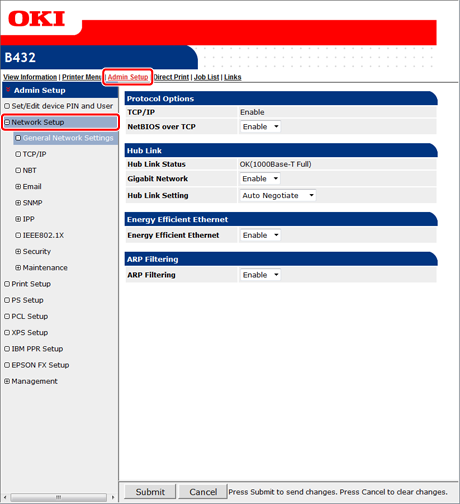
Click [Network Setup] on the [Admin Setup] tab.
-
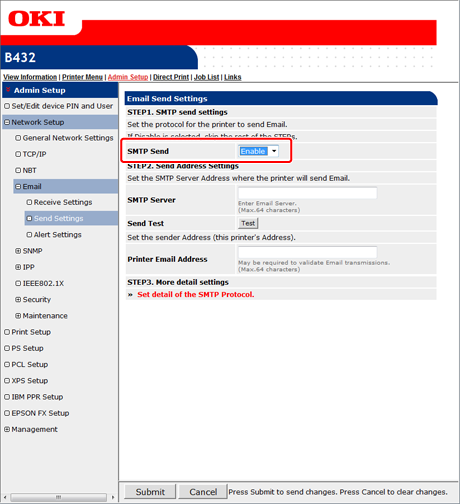
Select [Email] > [Send Settings].
-
Set [SMTP Send] to [Enable] in [STEP1. SMTP send settings].
-
Set the domain name or IP address of the mail server in [SMTP Server] in [STEP2. Send Address Settings].
-
Set the E-mail address that is assigned to the printer in [Printer Email Address].
Note
-
If you specify a domain name in [SMTP Server], you must set the DNS server for the [TCP/IP] setting.
-
You must set the mail server to allow the printer to send an E-mail. For details on the mail server setting, check with your network administrator.
-
-
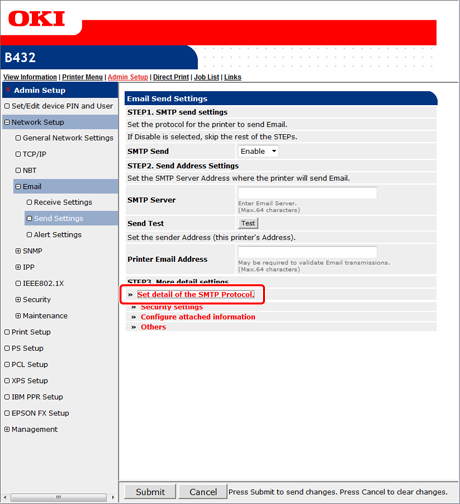
Click [Set detail of the SMTP Protocol.] in [STEP3. More detail settings].
If you do not need to set [Security Settings] and [Configure attached information], proceed to step 15.
-
Click [Security settings].
-
Select [Authentication Method].
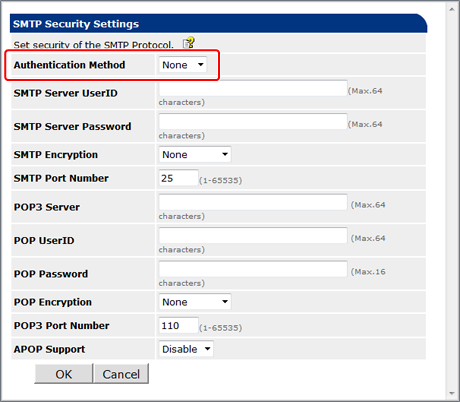
If you set [Authentication Method] to [SMTP], set [SMTP Server UserID], [SMTP Server Password], [SMTP Encryption], and [SMTP Port Number].
If you set [Authentication Method] to [POP], set [POP3 Server], [POP3 UserID], [POP3 Password], [POP3 Encryption], [POP3 Port Number], and [APOP Support].
Note
Incorrect settings result in the E-mail transmission function not working properly. Use care.
-
Click [OK].
-
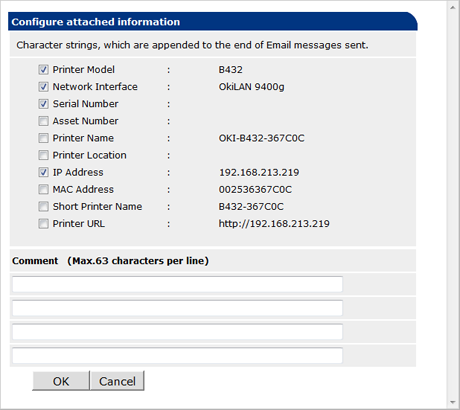
Click [Configure attached information].
-
Select or enter information you want to add to the end of an E-mail transmission massage.
-
Click [OK].
-
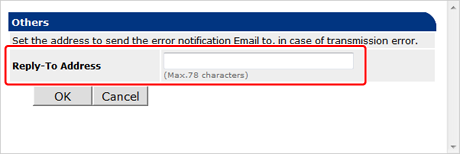
Click [Others].
-
Set an address to which a reply E-mail is sent to [Reply-To Address].
Note
Usually, set the E-mail address of the printer administrator.
-
Click [OK].
-
Click [Submit].
The settings are saved to the printer, and the network function restarts.
Memo
An authentication method is automatically selected from authentication methods that are supported by the mail server.