
Printing on Labels
First, load the labels in the MP tray, and then register the paper settings in the printer. Next, start an application, and then set the printing settings with the printer driver.
Note
-
Printing on labels is not possible from Tray 1 and Tray 2 (optional). They are printed from the MP tray.
-
Printing speed is slow.
-
Jobs are automatically discarded when the time taken to load the paper exceeds the manual timeout time (factory default setting is one minute) set from the system configuration menu.
-
The PS printer driver is not available with B412.
Loading Labels
-
Load labels in the MP tray.
-
Open the faceup stacker on the rear side of the printer.
-
Press
 on the operator panel to display [MENUS], and then press
  (OK).
(OK).[TRAY CONFIG] is displayed.
-
Press
(OK) to display [MP TRAY CONFIG]. -
Press
(OK) to display [MEDIATYPE]. -
Press
(OK) to make [PLAIN] flash. -
Press
or  to display [LABELS].
 -
Press
(OK) to add [*] to the right side of the set value. -
Press
 or
or  to display [MEDIAWEIGHT], and then press (OK).
[MEDIUM] flashes.
-
Press
or to display [HEAVY]. -
Press
(OK) to add [*] to the right end of the set value. -
Press
 (ONLINE) to select [READY TO PRINT].
Next, set printing settings from a printer driver.
For Windows PCL Printer Driver
-
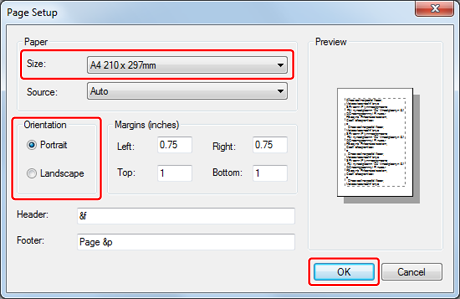
Select [Page Setup] from the [File] menu.
-
Select [A4] or [Letter] for [Size], and [Portrait] or [Landscape] for [Orientation], and then click [OK].

-
Select [Print] from the [File] menu.
-
Click [Preferences].
-
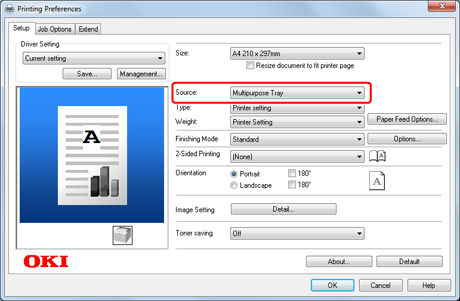
Select [Multipurpose Tray] for [Source] on the [Setup] tab.
-
Click [OK].
The [Printing Preferences] screen closes.
-
Click [Print] on the [Print] screen.
Printing starts.
For Windows PS Printer Driver
-
Select [Page Setup] from the [File] menu.
-
Select [A4] or [Letter] for [Size], and [Portrait] or [Landscape] for [Orientation], and then click [OK].

-
Select [Print] from the [File] menu.
-
Click [Preferences].
-
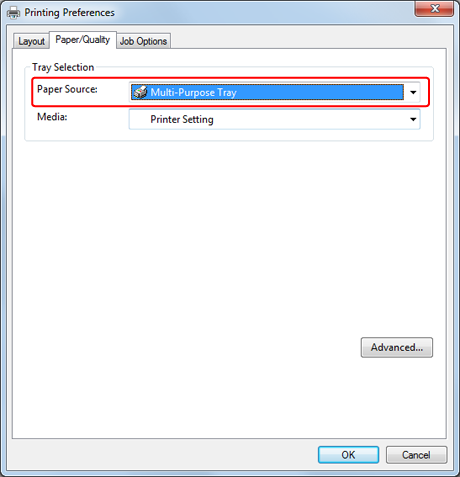
Select [Multi-Purpose Tray] for [Paper Source] on the [Paper/Quality] tab.
-
Click [OK].
The [Printing Preferences] screen closes.
-
Click [Print] on the [Print] screen.
Printing starts.
For Windows XPS Printer Driver
-
Select [Page Setup] from the [File] menu.
-
Select [A4] or [Letter] for [Size], and [Portrait] or [Landscape] for [Orientation], and then click [OK].
-
Select [Print] from the [File] menu.
-
Click [Preferences].
-
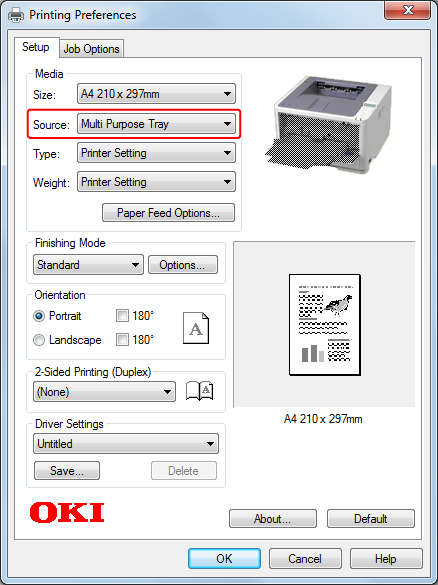
Select [Multi Purpose Tray] for [Source] on the [Setup] tab.
-
Click [OK].
The [Printing Preferences] screen closes.
-
Click [Print] on the [Print] screen.
Printing starts.
For Mac OS X PS Printer Driver
-
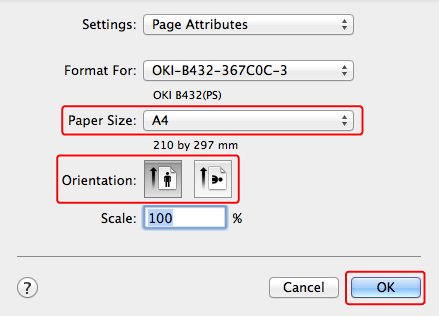
Select [Page Setup] from the [File] menu.
-
Select [A4] or [Letter] for [Paper Size], and the appropriate orientation for [Orientation], and then click [OK].
-
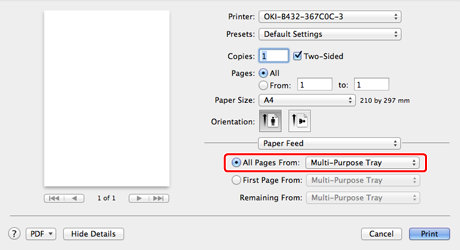
Select [Print] from the [File] menu.
-
Select [Paper Feed] from the panel menu.
-
Select [Multipurpose Tray].
-
Click [Print].
Printing starts.
For Mac OS X PCL Printer Driver
-
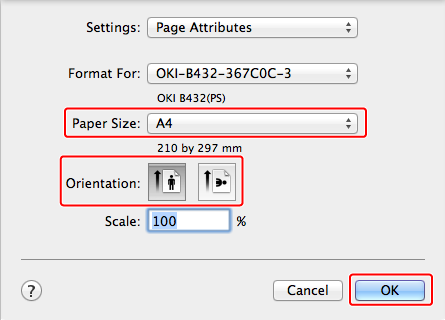
Select [Page Setup] from the [File] menu.
-
Select [A4] or [Letter] for [Paper Size], and the appropriate orientation for [Orientation], and then click [OK].
-
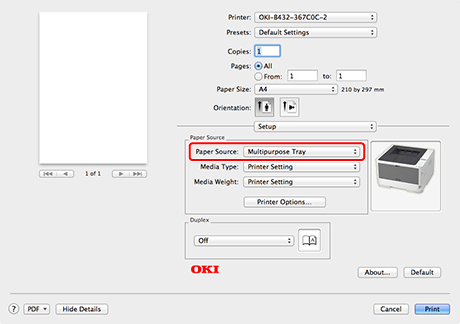
Select [Print] from the [File] menu.
-
Select [Setup] from the panel menu.
-
Select [Multipurpose Tray] from [Paper Source].
-
Click [Print].
Printing starts.