
Overlaying Forms or Logos (Overlay Print)
Forms and logos can be registered in the printer for overlay printing. Create the forms to use and register it in the printer in advance.
Note
-
This function is not available with the Mac OS X printer driver.
-
You must have the administrator rights for the computer when working with the Windows PS printer driver.
-
This function is not available with the Raster print mode of PCL driver.
-
The PS printer driver is not available with B412.
Memo
You can create a form and register it in the printer in advance.
For Windows PCL Printer Driver
-
Select [Print] from the [File] menu.
-
Click [Preferences].
-
Click [Overlay] on the [Extend] tab.
-
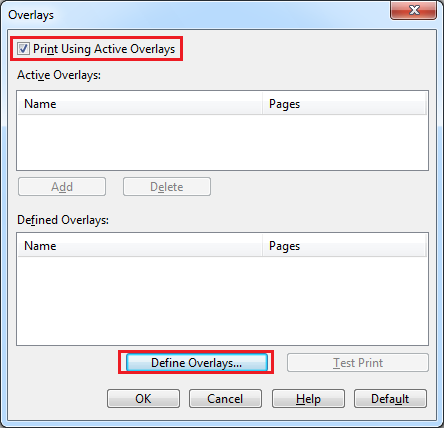
Select the [Print Using Active Overlays] check box on the [Overlays] screen, and then click [Define Overlays].
-
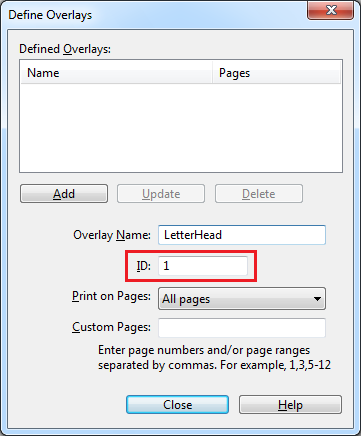
Enter a name in [Overlay Name], and then enter the ID of the form you registered with the Storage Manager plug-in in [ID].
Registering Forms (Form Overlay)
Memo
An overlay is a group of forms. You can register three IDs (form files) to an overlay.
The forms, or overlay, are overlaid in the order of registration.
-
For [Print on Pages], select the pages to which the overlay is applied. To apply an overlay by specifying the pages, select [CUSTOM], and then enter the pages to which to apply the overlay in [Custom Pages].
-
Click [Add].
-
Click [Close].
-
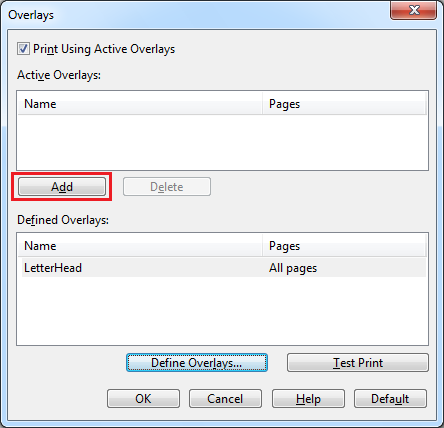
Select an overlay to use from the defined overlays, and then click [Add].
-
Click [OK].
-
Change other settings if necessary, and then click [OK].
The [Printing Preferences] screen closes.
-
Click [Print] on the [Print] screen.
Printing starts.
For Windows PS Printer Driver
-
Click [Start], and then select [Devices and Printers].
-
Right-click the [OKI B432(PS)] icon, and then select [Printing Preferences].
-
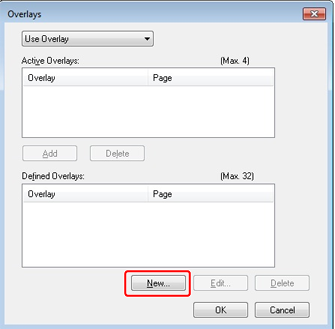
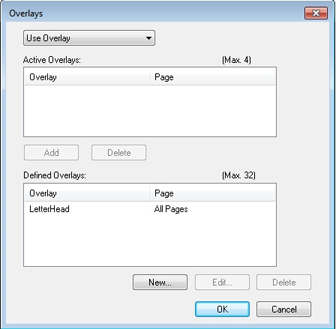
Click [Overlays] on the [Job Options] tab, and then select [Use Overlay].
-
Click [New].
-
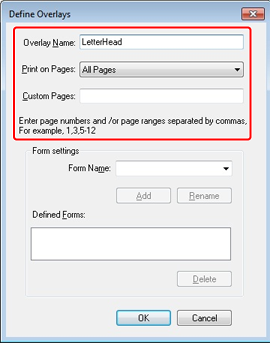
Enter the form name that you registered with the Storage Manager plug-in in [Form Name], and then click [Add].
-
Enter a name in [Overlay Name], and then select from [Print on Pages] the pages to which the overlay is applied. To apply an overlay by specifying the pages, select [Custom], and then enter the pages to which the overlay is applied in [Custom Pages].
Memo
Enter a name in [Overlay Name], and then select from [Print on Pages] the pages to which the overlay is applied. To apply an overlay by specifying the pages, select [Custom], and then enter the pages to which the overlay is applied in [Custom Pages].
-
Click [OK].
-
Select an overlay to use from the defined overlays, and then click [Add].
-
Click [OK].
-
Change other settings if necessary, and then click [OK].
The [Printing Preferences] screen closes.
-
Click [Print] on the [Print] screen.
Printing starts.